|
|
|
Porsche, and the Porsche crest are registered trademarks of Dr. Ing. h.c. F. Porsche AG.
This site is not affiliated with Porsche in any way. Its only purpose is to provide an online forum for car enthusiasts. All other trademarks are property of their respective owners. |
|
|

  |

| Chad911sc |
 Nov 29 2025, 01:52 PM Nov 29 2025, 01:52 PM
Post
#1
|
|
Member  Group: Members Posts: 243 Joined: 24-September 24 From: Florida Member No.: 28,374 Region Association: South East States |
So I’m going to be assembling the 2056 again these next couple of weeks, but wanted to get some feedback on ring set up. I’ve always staggered my compression rings on top of each wrist pin 180• apart from each other. This is how I set it up when I built it. See 1st two pics.
Upon tearing down the engine after approx 3 hrs of run time due to low hot oil pressure, this is what I found. See pics 3-5. On piston #1 and 2, they were exactly where I placed them when I built the engine. But on cylinder #3, the top compression ring had rotated all the way around almost on top of the compression ring below it! And on piston #4, one of the compression rings had moved into the skirt area. The interesting thing is on cylinder #3, the one where the compression rings were over each other, I always had a 1.5 lower reading on my vacuum gauge while trying to sync the carbs. Carb throat #1,2,4 would read at say 7 on my snail, and throat #3 would read 5.5. I guess it’s just luck of the draw where they end up, even if you set them correctly. I’ve never had one of my engines apart before, until this 914. (IMG:style_emoticons/default/headbang.gif) All the other engines I’ve built ran great and still are after 25 years on some of them. I never considered that the rings would move so much around the pistons. Attached thumbnail(s) 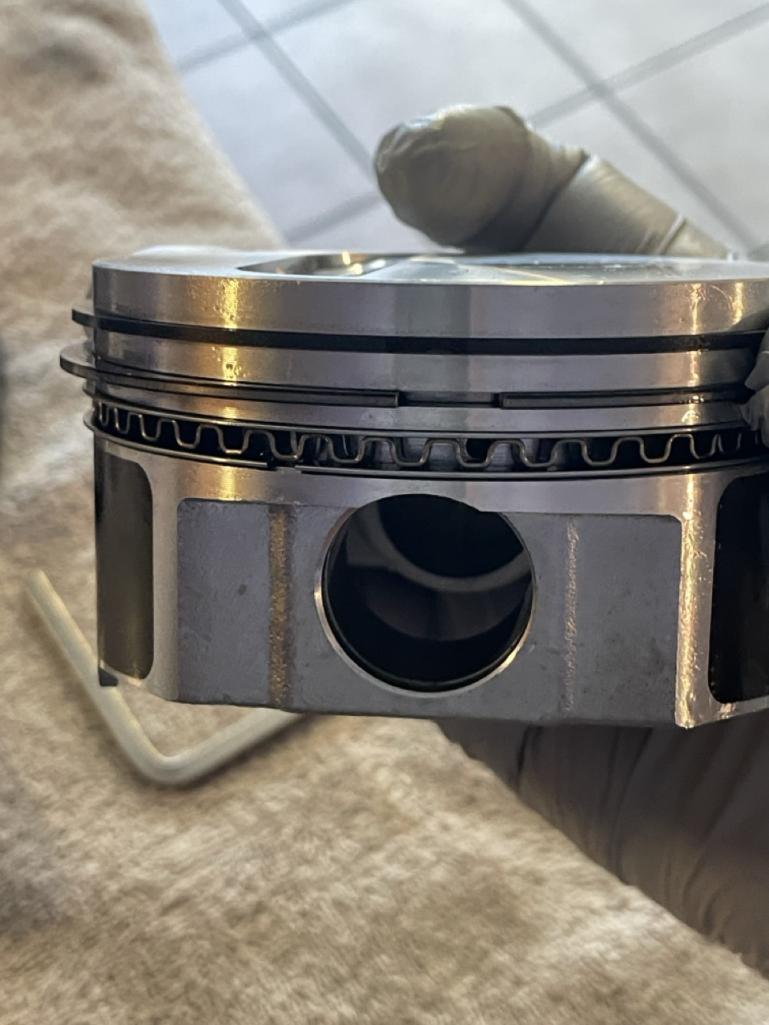 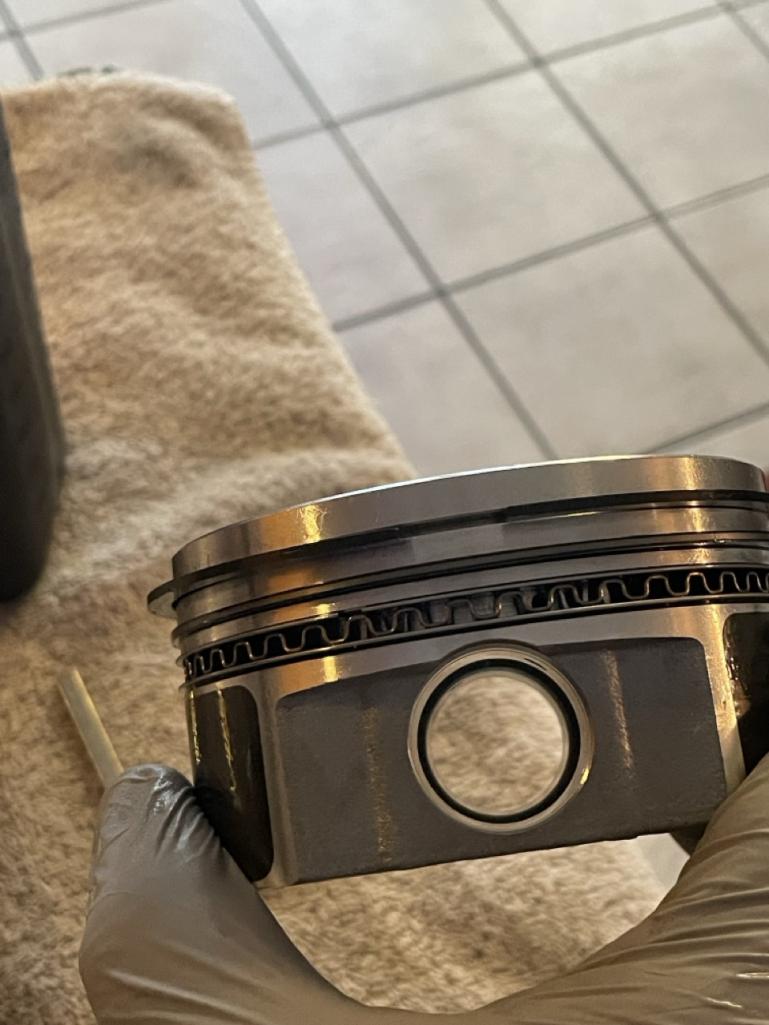 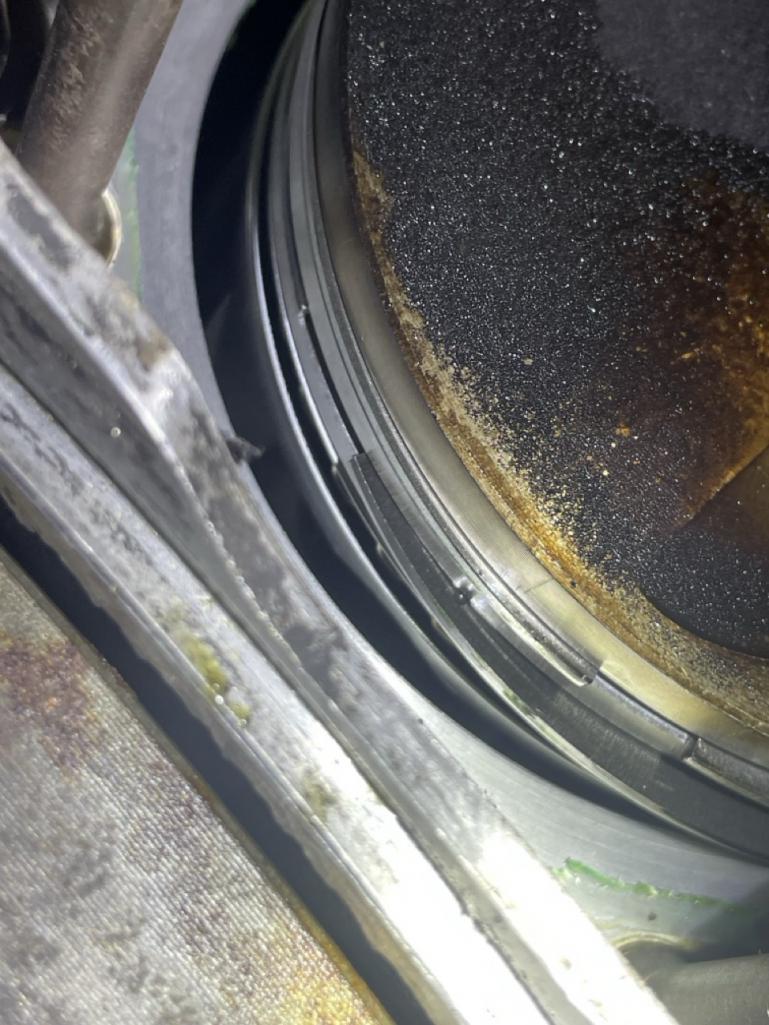 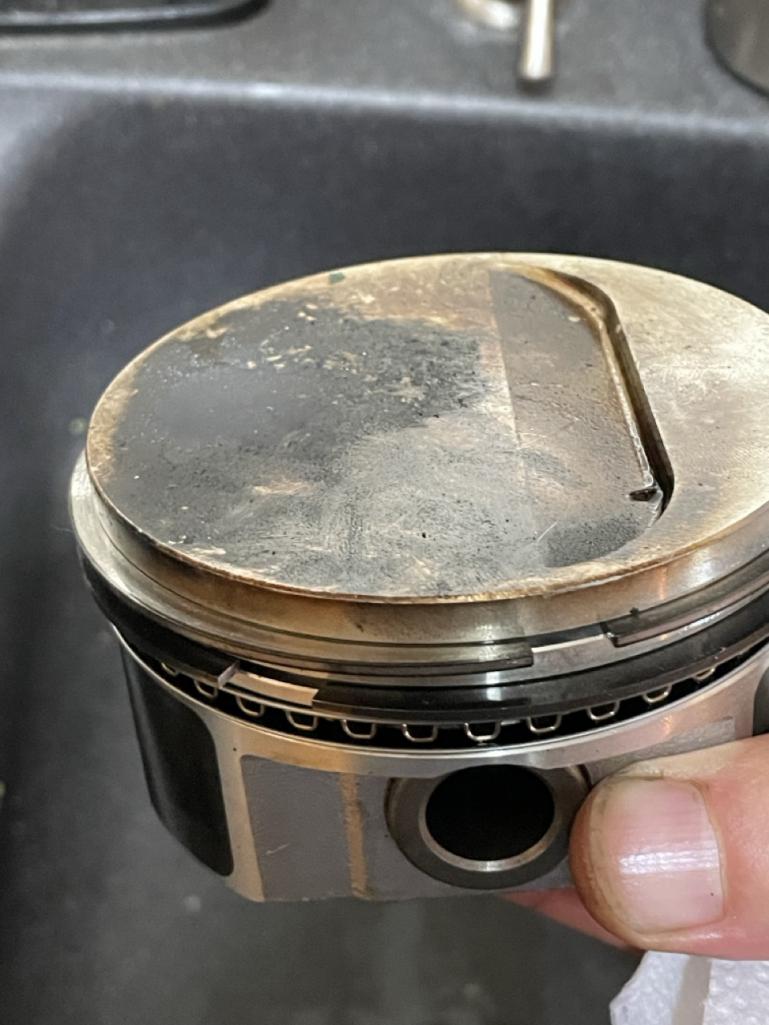 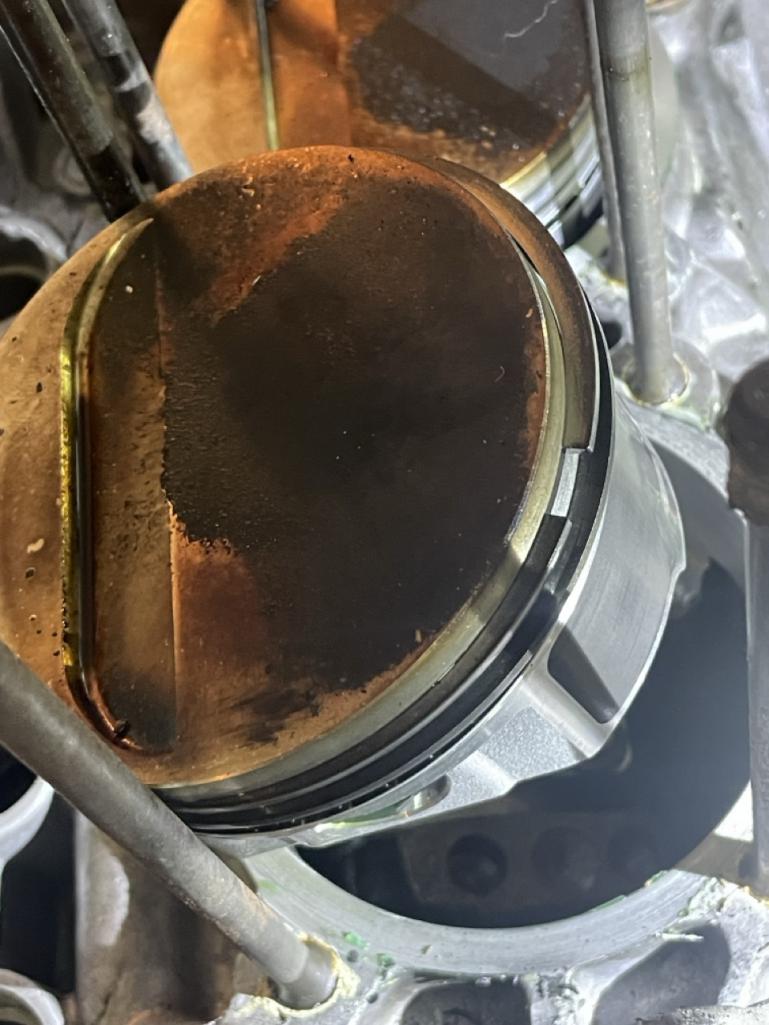
|
   |

 
|
| Ninja |
Nov 29 2025, 02:34 PM
Post
#2
|
|
Newbie Group: Members Posts: 34 Joined: 25-September 25 From: Granbury Texas Member No.: 29,004 Region Association: Southwest Region |
Rings dance around the pistons normally.
Nothing to worry about. Valve adjustment is a far bigger contributor for the issues you were having on #3. Just a couple of thousands difference will effect the compression test and vacuum readings. |
|
|
|
| Chad911sc |
Nov 30 2025, 06:28 AM
Post
#3
|
|
Member Group: Members Posts: 243 Joined: 24-September 24 From: Florida Member No.: 28,374 Region Association: South East States |
10-4
Will pay very close attention to that when putting her back together. |
|
|
|
| Ninja |
Nov 30 2025, 12:00 PM
Post
#4
|
|
Newbie Group: Members Posts: 34 Joined: 25-September 25 From: Granbury Texas Member No.: 29,004 Region Association: Southwest Region |
Another point...
Every single head I have had done by a machine shop REQUIRES hand lapping of the valves. I DO NOT allow them to install the springs. Even when they tell you they are using Serdi equipment and you shouldn't; you SHOULD! A leak down with the head on and a bit of liquid (WD40) in the port will show severe bubbles until you hand lap. Even perfectly lapped you will have a small number of bubbles. I've noticed that the valves require less adjustment on the second go around (after 1 hour of use) when they are hand lapped. You complete 75% of the valve "seat in" with the lapping. When the intake valve closes (valve timing and valve clearance adjustment) and how well the valves seal has more to do with consistent compression tests and vacuum readings than anything else. I do multiple leak downs during my builds. When the valve train is not installed you can easily do leak downs at TDC and BDC. When the manifolds aren't installed, you can see and hear seat leakage. |
|
|
|
| brant |
Nov 30 2025, 12:40 PM
Post
#5
|
|
914 Wizard Group: Members Posts: 12,102 Joined: 30-December 02 From: Colorado Member No.: 47 Region Association: Rocky Mountains |
Also regarding oil changes
I do a non detergent oil for 20 minutes. Then an oil change to non synthetic Then about 100 miles more until the next oil change So lots of oil changes as there are lots of particles created during the break in |
 |
|
| Chad911sc |
Dec 1 2025, 06:59 AM
Post
#6
|
|
Member Group: Members Posts: 243 Joined: 24-September 24 From: Florida Member No.: 28,374 Region Association: South East States |
I used the Brad Penn break in oil for cam break in, then changed it after the last time. Won’t need to do the cam break in again. Was planning on changing it after 100 miles this time since everything should be seated in. I am putting all the lifters, pushrods and pistons back in the same place. I a using the 30 Brad Penn again for the first 100 miles.
@ninja Yeah my head guru is my best friend of 30 years, he does all my heads on my cars I build. He puts his special cuts on the valves and hand laps them all before I get them back. |
|
|
|
|
1 User(s) are reading this topic (1 Guests and 0 Anonymous Users)
0 Members:

|
Lo-Fi Version | Time is now: 1st December 2025 - 02:10 PM |
Invision Power Board
v9.1.4 © 2025 IPS, Inc.